28 Aug 2025
Post by Sierra
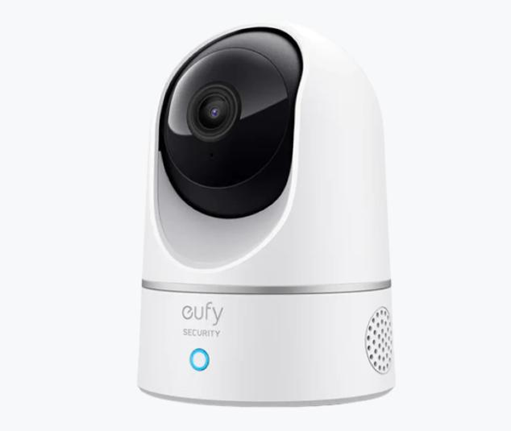
Installing a PTZ (Pan-Tilt-Zoom) security camera indoors requires careful planning to leverage its dynamic movement while avoiding common pitfalls like obstructions or poor angles. Unlike outdoor setups, indoor environments present unique challenges—from low ceilings and furniture to varying lighting conditions—making strategic placement and setup critical. A well-installed indoor PTZ camera can monitor large spaces like offices, warehouses, retail floors, or home interiors with a single device, tracking movement and zooming in on details as needed. This article shares essential tips for installing indoor PTZ cameras, ensuring they deliver maximum coverage, clear footage, and reliable performance to enhance your security setup.

Choosing the Right Location for Maximum Coverage
Height and Positioning for Unobstructed Views
The indoor PTZ security camera performs best when mounted at a height that balances coverage and detail. Aim for 8–12 feet (2.4–3.6 m), high enough to clear shelves, cubicles, or lights, yet low enough to capture faces or registers. Ceiling mounts suit open spaces like lobbies or warehouses, offering unobstructed 360° pan. For drop ceilings, use sturdy brackets to prevent wobbles that can blur footage. In hallways, wall-mounting at one end with a slight downward angle allows smooth tracking from entry to exit. Avoid placing cameras directly above doors or windows with strong sunlight, as glare can wash out footage—mount slightly to the side for balanced visibility.
Targeting Critical Zones
Focus PTZ cameras on high-priority zones such as entry points (doors, elevators), valuable assets (safes, server rooms, inventory), high-traffic areas (checkout lanes, reception), and blind spots (corners, behind equipment). Mount the camera to minimize constant panning—for example, in retail, place it near the registers to watch cashiers while still covering aisles and exits. In offices, aim at entryways and meeting rooms. Use presets to save positions for each critical zone, like “Reception” or “Warehouse Aisle,” so operators can quickly switch views and zoom without manual adjustments. Test coverage by walking through the monitored area, ensuring smooth tracking and that all key zones remain visible when panning and tilting.

Mounting and Wiring for Stability and Safety
Secure Mounting to Prevent Movement
A stable mount is essential for clear footage. Use the manufacturer’s recommended mounting hardware to attach the bracket to ceiling joists or wall studs (avoid drywall alone, as it may not support the camera’s weight). For drop ceilings, use “T-bar” mounts designed to clamp securely to ceiling grids. Ensure the mount is level using a bubble level—an unlevel camera will have skewed presets and uneven coverage. Once the bracket is secure, attach the camera and tighten all screws to prevent shifting over time. If the camera is visible to the public (e.g., in a retail store), opt for a low-profile mount to avoid drawing attention, but prioritize stability over aesthetics. For hidden or discreet monitoring (e.g., in warehouses), larger mounts are acceptable as long as they don’t block the camera’s view.
Concealing Wires for Safety and Aesthetics
Indoor PTZ cameras often require power and network connections, and exposed wires can be unsightly or pose tripping hazards. Use PoE if possible—this allows a single Ethernet cable to deliver both power and data, reducing clutter. Run cables through ceiling cavities, wall ducts, or cable trays to hide them from view. For surface-mounted wires, use cable clips or raceways to secure them along walls or ceilings, keeping them out of reach. Avoid running wires near heat sources (e.g., radiators, lights) or high-traffic areas where they might be damaged. If using a wireless PTZ camera, ensure it’s within range of your Wi-Fi router—test signal strength with a mobile app before mounting. Add a Wi-Fi extender if needed to prevent lag or disconnections, which can disrupt monitoring. For wired connections, label cables at both ends to simplify troubleshooting later.
Configuration and Calibration for Optimal Performance
Adjusting Settings for Indoor Conditions
Indoor environments often present inconsistent lighting conditions—ranging from bright natural light near windows to dim corners or areas with harsh fluorescent bulbs. To maintain clear video quality, fine-tune your PTZ camera’s settings accordingly. Enabling Wide Dynamic Range (WDR) helps balance high-contrast scenes, ensuring both shaded areas and bright windows remain visible. In spaces with strong overhead lighting, lower the exposure to reduce glare and prevent washed-out footage. For low-light zones such as storage rooms or hallways, activate night vision or carefully adjust ISO levels to enhance brightness without creating excessive noise. Always test settings at different times of day and under varying light sources to confirm consistent performance and reliable image quality across the entire indoor space.
Testing and Fine-Tuning Presets
Once the PTZ camera is mounted, thoroughly test its pan, tilt, and zoom functions to confirm smooth, precise movement without hesitation or lag. Begin by calibrating presets: save positions for each critical zone, then cycle through them to ensure full coverage. If transitions skip or miss areas, refine the angles and ranges until every zone is captured. Pay close attention to zoom capability—verify that details such as license plates, ID badges, or product labels remain clear and legible. Afterward, connect the camera to your NVR, monitoring software, or mobile app to test remote access. Confirm you can seamlessly control PTZ functions, switch presets, and review footage from anywhere, ensuring reliable performance in real-world conditions.
Conclusion
Indoor PTZ camera installation requires careful planning and attention to detail for the best results. Start by selecting an optimal location that covers essential zones such as entrances, hallways, or high-traffic areas. Ensure the camera is securely mounted on a stable surface and conceal the wiring to maintain a clean look and prevent tampering. Fine-tune the settings to match indoor lighting conditions and test different presets for smooth panning, tilting, and zooming. With proper setup, your PTZ camera becomes a reliable solution for home, office, or retail surveillance, enhancing both security and peace of mind.
